📹 How to Create Cool Product Demo Videos with Sopilot
Overview of Sopilot Screen Recording
SoPilot is an AI-powered social media growth assistant specifically designed for Independent Developers (Indie Hackers), creators, and content creators. It automatically generates high-quality content through AI, continuously optimizes AI creation and interaction capabilities, improves product marketing efficiency, and helps achieve rapid social media growth.
Sopilot provides a simple screen recording feature that allows you to record screen videos and offers an intuitive interface for previewing and editing recorded screen videos. It's primarily used to quickly create product demonstration videos and publish them on social media to attract potential customers.
Key features include:
- Video playback preview and control
- Video zoom effects
- Customizable background styles
- Smart zoom interval management
- Video export capabilities
Prerequisites
Before starting, please ensure:
- Sopilot Chrome extension is installed
- You're logged in to Sopilot with your Google account
- You're logged in to your X (Twitter) account
For installation steps, see: How to Install Sopilot Chrome Extension
Detailed Operation Guide
1. Start Recording
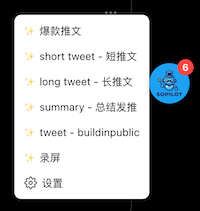
1.1 Click the Sopilot floating icon and select the screen recording feature to begin
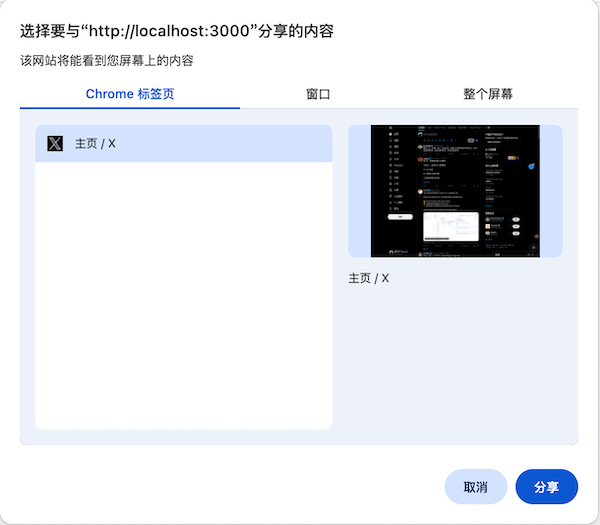
1.2 In the recording interface, select the window you want to record, then click the share button in the bottom right
(First-time users will be prompted to authorize screen recording permissions in the browser)
1.3 After recording, click the stop sharing button to end the recording

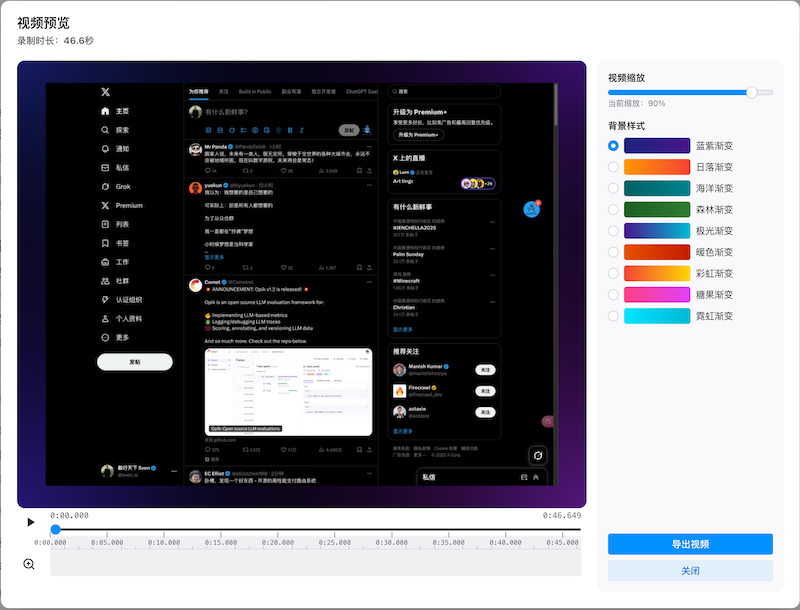
2. Video Preview and Progress Control
After recording ends, you'll automatically return to the recording interface with video preview and editing options
- Use the progress bar to adjust playback position
- Current time and total duration are displayed above the progress bar
- Time format: minutes:seconds.milliseconds
3. Video Zoom
3.1 Overall Zoom
- Use the "Video Zoom" slider in the right control panel
- Zoom range: 10% - 100%
- Real-time preview of zoom effects
3.2 Smart Zoom Intervals
Adding Zoom Intervals
- Play the video to the position where you want to add zoom effects
- Click the magnifying glass icon in the bottom left of the player
- The system will automatically add a 3-second zoom interval

Editing Zoom Intervals
- Moving Intervals: Directly drag the zoom block
- Adjusting Length:
- Drag the handles at both ends to adjust start and end times
- Specific time range is displayed below the block
- Setting Zoom Center Point:
- Click the zoom interval you want to edit (interval will be highlighted)
- Click the position in the video frame where you want to set the zoom center
- The system will display a crosshair marker to indicate the zoom center point
- Deleting Zoom Intervals:
- Click the × button in the top right corner of the interval to delete it
4. Background Style Settings
Multiple preset gradient background styles are available in the right control panel:

5. Timeline Operations
The timeline area includes:
- Major and minor scale markers
- Precise time annotations
- Zoom interval visualization
- Real-time interval duration display
6. Exporting Video
- After completing all edits, click the "Export Video" button at the bottom of the right panel
- Wait for the export progress to complete (progress percentage is shown in real-time)
- The video file will automatically download when export is complete
- Export format is WebM (VP9 codec) for high-quality output
Important Notes
- Zoom intervals cannot overlap
- Minimum duration for each zoom interval is 0.1 seconds
- New zoom intervals cannot be added at the video end position
- Do not close the window during export
- All effects are previewed in real-time during video playback
Quick Operation Tips
- Click anywhere on the progress bar to quickly jump to that position
- The system automatically prevents overlap when dragging zoom intervals
- After selecting a zoom interval, click anywhere on the video frame to update the zoom center point
- Use timeline scale markers for more precise control of zoom interval positions
Getting Help
This editor is designed for intuition and ease of use, allowing users to create professional video effects through visualization. For additional help:
- Visit the Sopilot Help Center
- Send an email to [email protected]
- Follow @SopilotAI on Twitter for latest updates and tips
Now you've mastered all the essentials of using Sopilot's screen recording feature. Start recording your product demo videos! If you encounter any issues during use, you can always close the dialog and start recording and editing again.